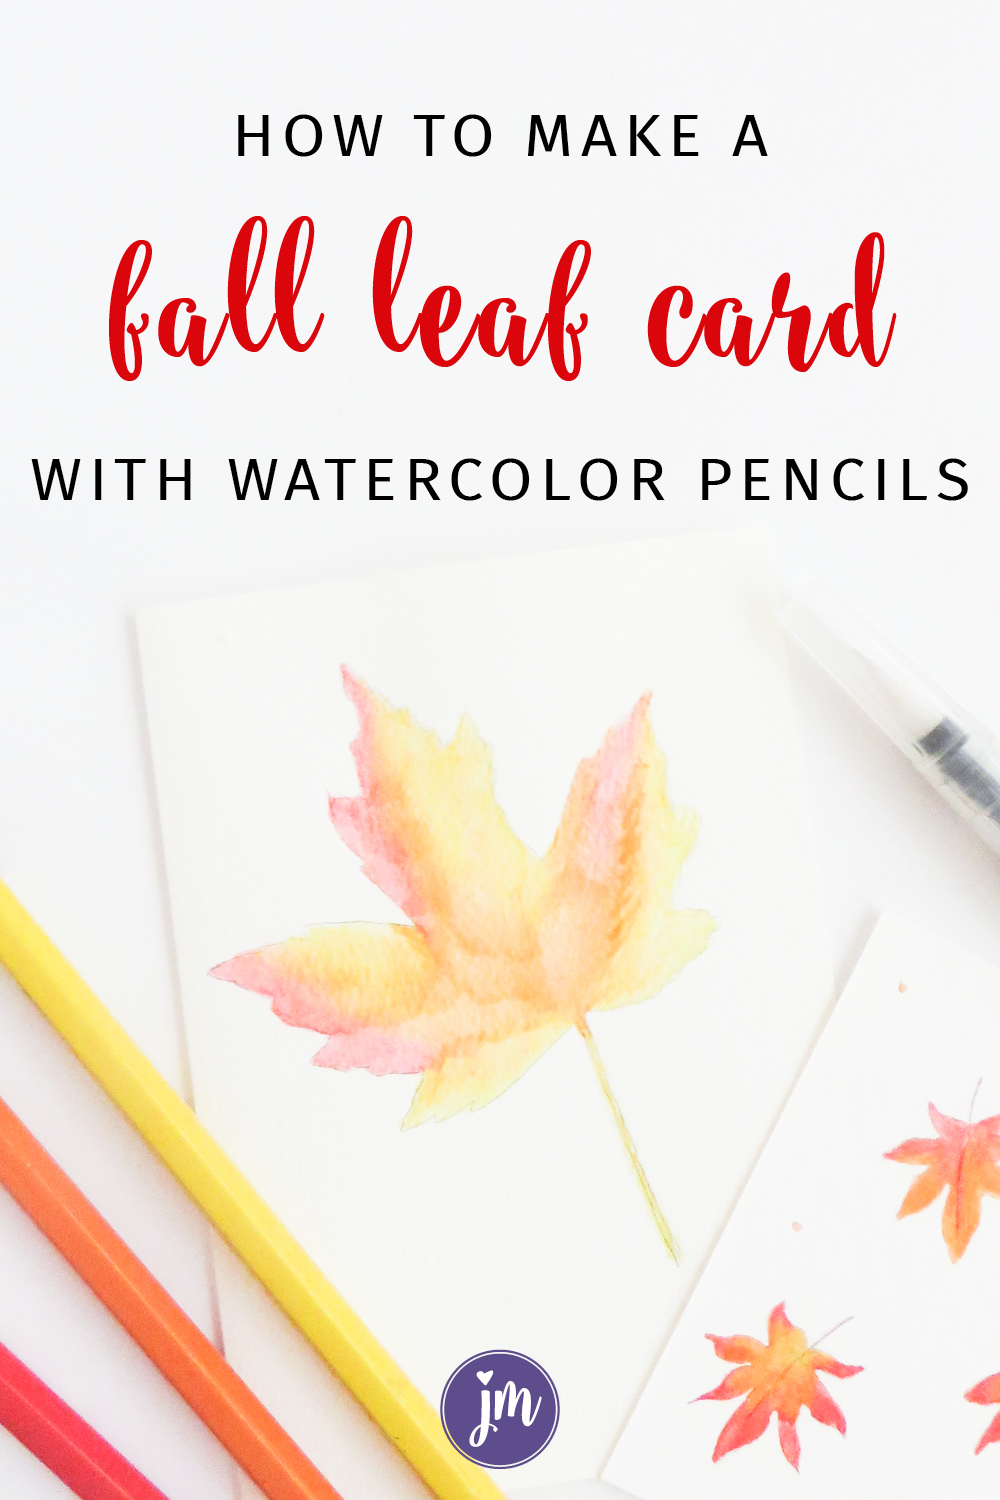
Learn how to make a fall watercolor leaf card using watercolor pencils. This is a simple project to do and will brighten a friend’s day when they receive it in the mail!
When I was visiting my parents recently, I had the chance to read through my mom’s stack of magazines and new-to-me cookbooks. You read cookbooks too, don’t you? I made notes on a scrap piece of paper as I read in hopes that I would come back and actually make some of the things that inspired me.
I found the tutorial for this particular card in a Martha Stewart magazine. The original tutorial called for traditional watercolors, but I prefer using watercolor pencils for most of my work. Doing so adds a sketchy ‘quality’ to this card which I like.
This is a great fall project because there are so many leaves, though if you’re like us, the early winter storm we had at the beginning of the month blew most of them away! I did manage to find a few good leaves that would work and pressed them overnight under a heavy book to make sure they were completely flat.
How to Make a Fall Watercolor Leaf Card
To make this watercolor leaf card the way I made it, you will need the following:
One leaf (preferably pressed so it is easier to trace)
One watercolor paper card (or heavy card stock that can handle watercolors)
Watercolor Pencils (These are my favorites.)
Water
Fine tip watercolor brush
A regular pencil
Eraser
1. Place the leaf on the card.
2. Carefully outline the leaf using your pencil.
3. Place the leaf to the side and color in the outline using your watercolor pencils.
4. Wet your brush and carefully paint the interior of the leaf outline. I love how the pencil colors become so vibrant when the water is added!
5. Let dry. You can erase the pencil marks once the watercolor is completely dry if you’d like. I prefer to see the pencil outline so I left them.
This technique can be adapted in a myriad of ways:
- Make a series of cards using different colors to follow the leaf through the seasons: green, yellow, red, brown.
- Create gift tags. Hole punch the corner of a card and string a piece of golden ribbon through for a lovely look.
- Choose several different kinds of leaves to trace and paint for a pretty piece of collage art.
- Rather than using watercolor paper as your surface, use canvas for wall art. In this case you would want to make sure to outline the leaf very lightly as pencil is a little more difficult to remove from canvas.
- Trace your child’s hand and make it into a pretty watercolor painting.
- Pull out the cookie cutters and make a fun collage or print using this technique.
P.S. If you like this tutorial, you’re going to LOVE my resource, The {10 Minute} Letter-writing Retreat. It’s packed with tutorials (like this one!), prompts, and printable stationery. Learn more about it here.
Have a lovely {and creative} day!


