Learn how to make a paper doll with this sweet tutorial!
When I was a little girl we had a small box with several different kinds of paper dolls inside. I had a Victorian family as well as a cat (I think it was Beatrix Potter’s Tom Kitten) and my sisters had several sets of their own paper dolls.
I’ll be honest and admit I never was very fond of cutting each of the outfits out mostly because by the time we had everything set up so we could play, our mom was calling out that it was time to clean up. Granted, that might have been an illusion since we tended to spend an exorbitant amount of time with the setting up of scenes compared to the actual playing with the dolls in those worlds. (Did you do that too?)
Anyway, that said, over the years one of the projects on my “I should do that someday” list has been to make my own paper dolls. It seems like such an obvious thing to do since I enjoy drawing but for whatever reason, I’ve never tried.
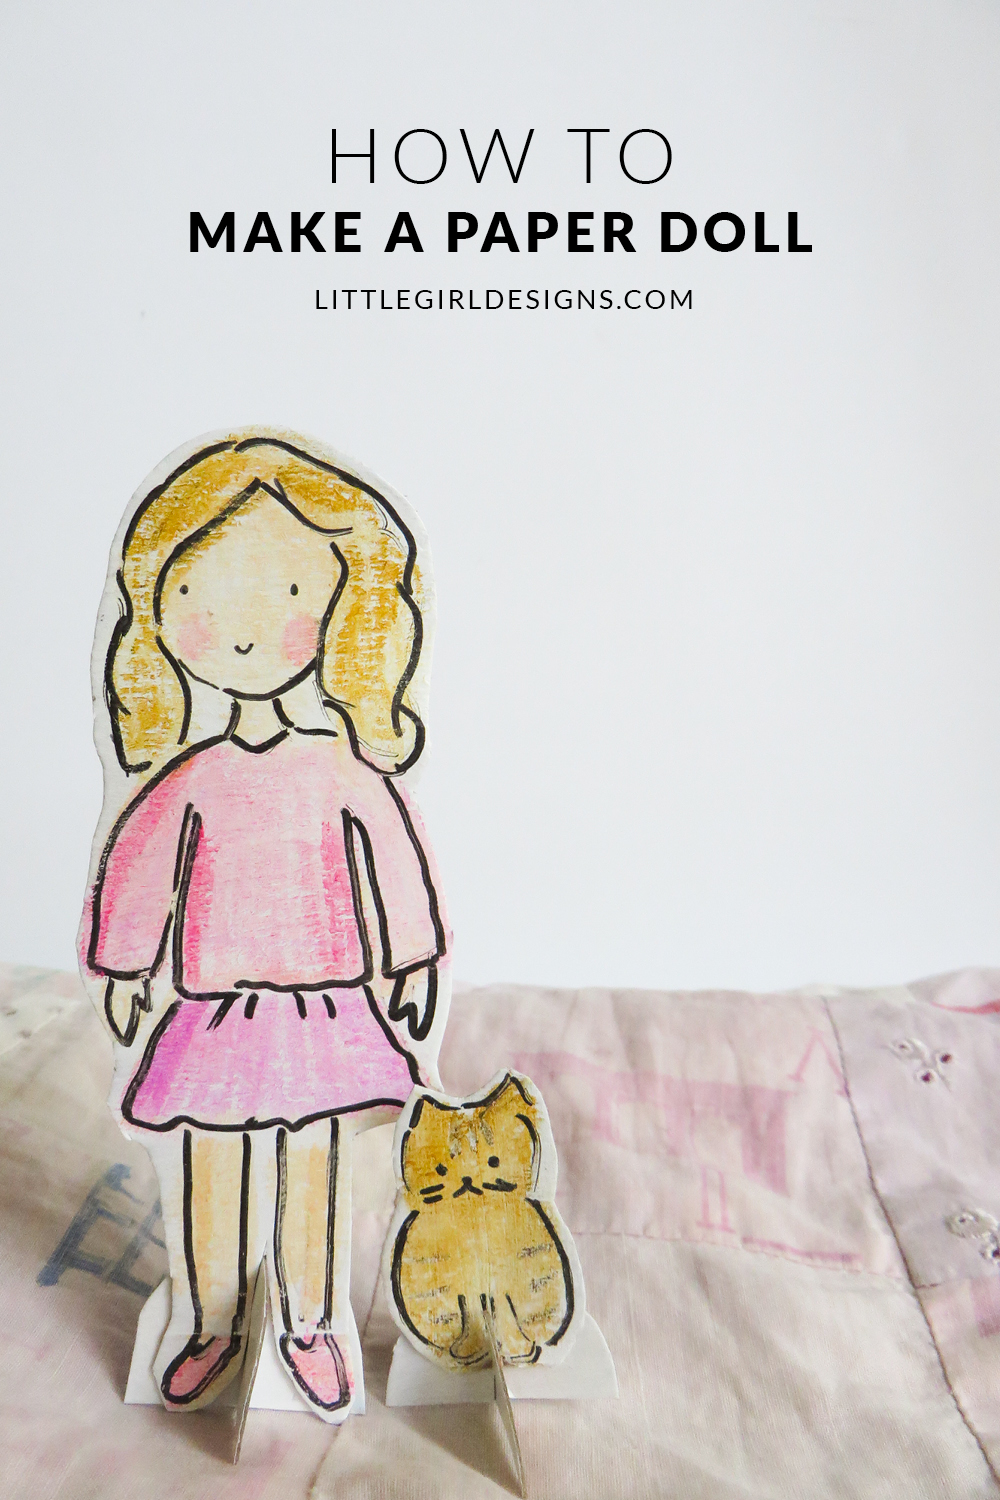
I was reminded of this someday project recently as I’ve been working through Carla Sonheim’s Drawing Lab for Mixed-Media Artists: 52 Creative Exercises to Make Drawing Fun (Lab Series). (This book makes me so happy!) She made her own paper dolls for an art show and shares how to make them. I followed most of her directions, but had to tweak them a bit since I didn’t have the exact supplies she called for. Still, I was able to make a sweet little girl and her friend, the cat, and I’m definitely going to make more now that I have the basics down.
To make your own, you really don’t need fancy supplies. If you don’t have gelato sticks, use washable crayons (what Sonheim specifies in her project) or gouache. Feel free to experiment on the cardboard to see what looks best. It’s only a cereal box after all, so you don’t have to worry about wasting anything. Most of all, have fun! Make a family, a set of friends, or a bunch of woodland creatures. See below for how I made mine.
How to Make a Paper Doll
You will need:
Marker pen
Cereal box
Acrylic paint or gesso
Paintbrush
Gelatos (I used pastels.)
Black brush pen
Scissors
Spray fixative
Sketch out your design using a pen on the inside of a cereal box that you have cut open to lie flat. You don’t have to be super-detailed here, just get an estimate on how big you want your doll to be. On a side note, next time I make these, I will make my doll about half the size I made so she will be a bit more stable when standing.
After you finish your design, paint over it using the gesso. This is where I veered from the instructions in Drawing Lab. Turns out my gesso was hard as a rock so I opted to use white acrylic paint instead. This meant my design was completely covered. If you use gesso, you will still be able to see at least a faint outline of your design so you can more easily color it in and add detail.
Using the gelato sticks, add the skin tone and color in your doll. You are just blocking out chunks of color right now. Don’t worry too much about the details. When you’re finished laying down your first layer of color, use a brush, paper towel, or napkin to blend the color. (You can also moisten these to add a touch of water to blend.) Now you’ll be able to see where you need to add more color. Add some highlights as shown.

For the cat. I drew a rough cat shape with the gelato stick, rubbed it a bit to blend the color and added some stripes with a darker stick. Remember that you’ll be cutting your creations out so it’s best if they are one uniform shape. (This is why I decided the kitty’s tail was behind her—easier to cut out!)
Once you like how your dolls look, pull out the brush pen and add your details. Don’t be too precious here. For some reason, quick lines look much better when you’re using a brush pen than when you press evenly and draw slowly. If you need to add a bit more gelato coloring after you’ve finished your highlights, go for it!
To set the color, place the doll on newspaper and spray with a fixative. Before you spray, make sure the fixative is safe to use with paper crafts (some of them are not.)
To make a stand, paint a circle of cardboard with acrylic, let dry and cut in half. Cut slits in these half moons and glue or tape your dolls to the stands.
And yes, I know a ‘traditional’ paper doll is one where you can change her clothes, but this tutorial makes it so you can get down to playing (or making more!) You could certainly draw your doll so you could easily add clothing if you’d like.


6 responses to “How to Make a Paper Doll”
Oh my goodness, Jennie, I love these! My sister and I loved paper dolls, we had a set from the Civil war era that had the BEST dresses! And yes, I totally know what you mean, we used to get all of our Barbies out, get them dressed and put into families, and then run out of time to actually play with them!
Most of the time my sister and I just played with paper dolls we had been given, but I do remember us spending one afternoon making mermaid paper dolls which we quite enjoyed.
Thanks for the inspiration, I may have to do this some afternoon!
Oh, you should, Hannah! We loved paper dolls & Barbies too. Wish I knew what happened to the paper dolls–they’re probably “vintage” now. haha
Yes, I have made paper dolls before! I made one each for three of my little girl friends. I just used cardstock and sharpies. It took a long time, but it was quite fun!
Love this, Maggie! 🙂
Fell down the Little Girl Desgin hole today….happy clicks! Then landed on this project and now have two kids happily working at the table 🙂 Thanks for sharing your work with the world.
Wow, what a sweet comment. Thank you so much, and that’s so awesome that your kids are making the paper dolls. I need to make some more one of these days—my daughter loved playing with them. (Kind of surprised me, given their Disney Princesses competition, haha!)