A few weeks ago, I noticed my daughter’s t-shirts were becoming crop tops. How in the world did that happen? This was a sad discovery since I had just emptied a couple of bags of hand-me-downs into her dresser drawers. I went through them again and realized that some of those cute tops would have to go straight back to her Auntie’s house. Maybe another little girl will get to wear them (sniff, sniff.)
Shortly after that discovery I happened to be at the craft store and noticed that t-shirts happened to be on sale. Which, on a side note, makes me really happy to see that decorating t-shirts is still considered a summer craft. That was our go-to activity back in the day. I wonder what ever happened to all of my neon puff paints . . . hmmm. Anyway, I decided to pick up a pink t-shirt to decorate for my daughter, and that’s how this craft was born. 🙂
How to Make a Decorated T-shirt
You will need:
Cotton t-shirt
Piece of cardboard to place inside shirt
Fabric paint pen (I used a white glitter pen.)
Iron-on Transfer Pen (see update at the bottom of this post)
Parchment paper
Iron
Embroidery floss
Embroidery needle
Scissors (to cut thread)
- Place the cardboard inside of the t-shirt just in case the paint pen leaks to the other side.
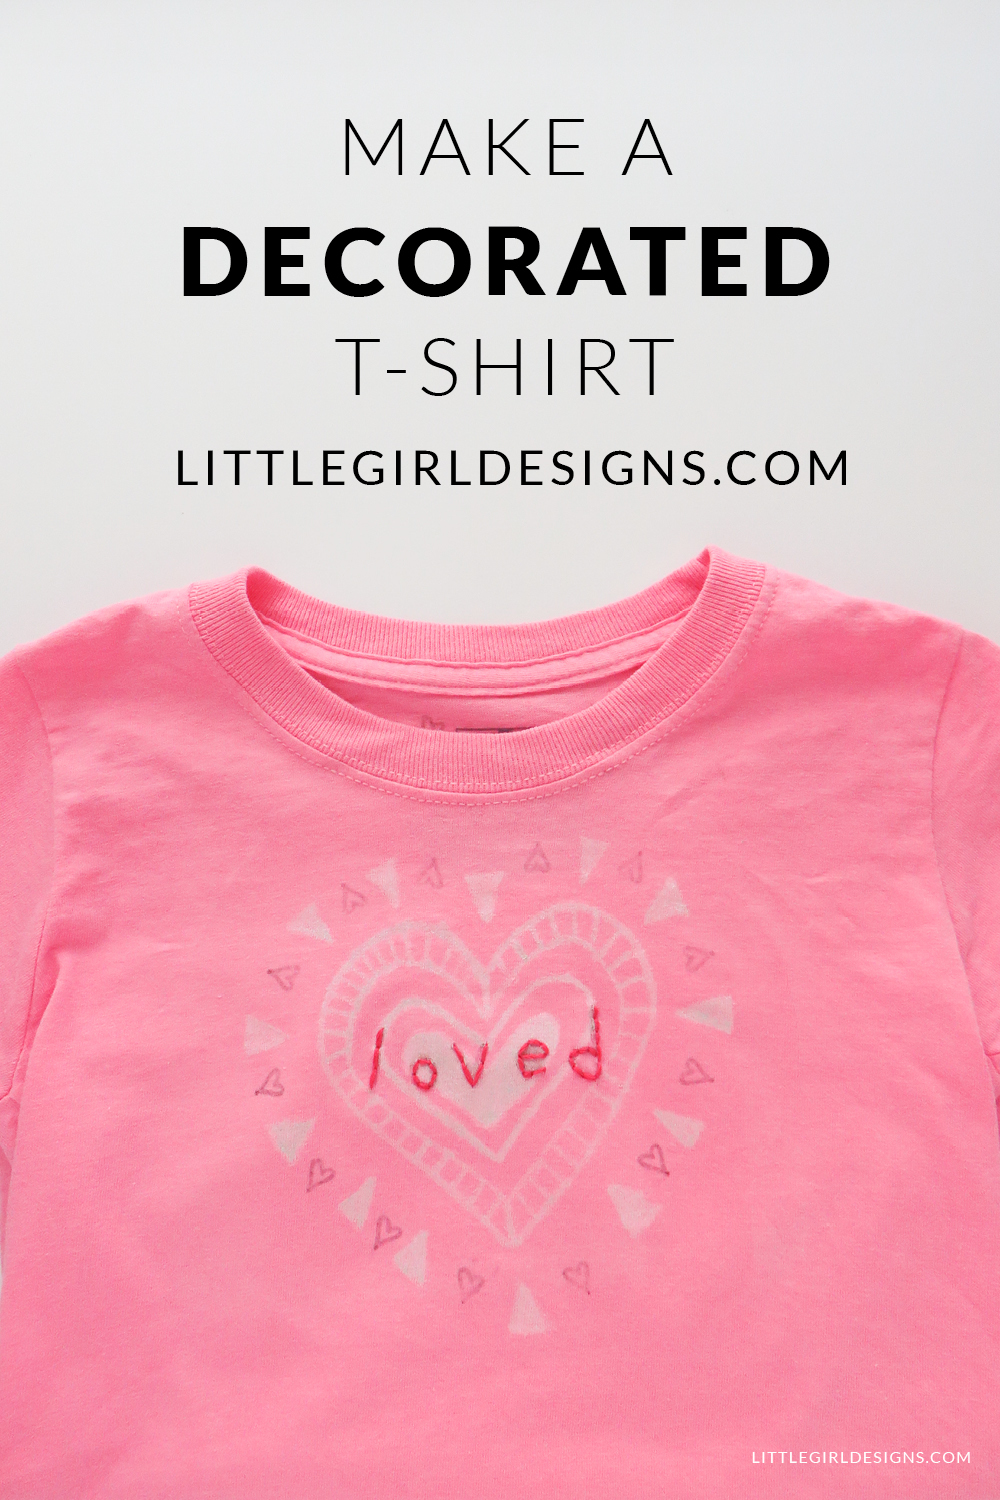
- I decided a simple heart motive would be fun so I uncapped my paint pen and drew the design you see below. The pen I used had glitter in it which was so girly and cute! Love.
- Set the t-shirt aside to dry completely. I wanted to really make sure the paint was set before moving to the next step so I waited until the next day to continue. Check your pen’s directions to see how long you need to wait.

- Have you ever used an iron-on transfer pen? They are pretty amazing. I drew a heart onto parchment paper, cut it out, and then tested the inside neck area (where the tag/logo is) to see how it worked. I highly recommend doing a test because I learned that if I ironed back and forth over the heart, it blurred the design.
- For the rest of the hearts, I simply placed the parchment paper (with the design face down) onto the t-shirt and used the tip of the iron to press down firmly for a few seconds. The effect is very soft and reminded me of a stamp. I will definitely be using that pen again. (The possibilities!!!)
- Anyway, I originally used the transfer pen and paper for the “loved” sentiment across the shirt but it was so light against the paint pen, I decided to embroider it. On a side note, if you do want to write a word (or words) using a transfer pen, make sure that you write them backwards on the parchment paper and then iron on. Otherwise, your words will be backwards on the shirt.
- I used six strands of embroidery floss in a bright pink and back stitched the word, “loved” across the shirt. You can put your shirt in an embroidery hoop for this work or do it freehand. When you’re finished, cut the thread, and weave the end into the back of the stitches.

I love how this shirt turned out, and since I bought it one size too big, it’s a night shirt for now. (I want the munchkin to wear it more than once! :))
Have you ever used a iron-on transfer pen or paint pen? They’re a lot of fun!
Have a lovely {and creative} day!
**Update** – I originally made this shirt as shown with the transfer pen but after washing it several times, the pen ink noticeably faded. This is actually the purpose of a transfer pen in that you usually use them to lay down a pattern and then stitch over the pen. All of the transfer pens I’ve used in the past are actually water soluble so they disappear the second you rinse them with water.
That said, I will still use the transfer pen for designs that are meant to be more permanent but not on items that are going to be washed over and over. For instance, a tote bag would still work great with a transfer pen because you’re probably not going to toss it in the wash every time you use it. A toddler’s t-shirt? Yeah, not the ideal “canvas”. But, hey, you live and learn, right? I just wanted to update this post just in case you’re considering using a transfer pen for your final design. The fabric pen and stitching, of course, are holding up perfectly.


18 responses to “Make a Decorated T-shirt”
I’m dropping by from the Creative Exchange link party. This is such a darling idea! I’ve got 5 granddaughters that I could make this cute t-shirt for! I’m so glad you shared your idea at the link party.
I have a link party that I am trying to grow. I invite you to share this idea (and a couple of others) at my Grandma Ideas Sharing Time link up at http://grandmaideas.com. I think my readers would LOVE this idea, too.
My linkup is open Wednesday through Friday at midnight Mountain Daylight Time. I hope to see you there!
All the best,
Nina
Thanks so much for your comment, Nina. My daughter is wearing the t-shirt today and it’s too cute! I’ll stop by your party today–thanks for the invite! 🙂
This is so cute! I have made a few t shirts with our grandchildren using puffy pens and washable ink. I think this is a fun project too. Thank you for sharing at the Thursday Favorite Things blog hop. Watch for your feature on Monday xo
Thanks so much for the feature! 🙂 I loved making this t-shirt–now I need to find something else to decorate with these pens because they’re so much fun to use! 🙂
Adding that little word in the middle of that shirt just makes the entirety of it! My daughter would probably enjoy making something like this. I should talk to her about potentially making one.
http://www.mountainscreenimpressions.com/
Thanks so much for your sweet comment. 🙂 Yes, you (or your daughter) could stitch any word that is meaningful to you. I couldn’t help putting “loved” on my daughter’s shirt. Thanks for stopping by! 🙂
Jennie, it looks like you know very well about designing t-shirts. For now, my wife and daughter are looking for ways to design several t-shirts that they found. I’m seeing if there’s a design your own shirt class at the library since that’s what the both of them enjoy doing. http://skyyscreenprinting.com
I love the hearts on these. Such a creative design! Thanks so much for the inspiration.
This seems like it would be a really fun thing to do, maybe even try and get my daughter to help me with it. Having an activity that both of us enjoy doing together like this would be really nice, and maybe we could keep doing it in the future. Good to know that they have shirts and things in some craft stores too.
I’ve never thought of designing my own t-shirts for my kids, but I love the example you gave! I think that I have most of the supplies you’ve listed, but I need the Iron-on Transfer Pen! I’m excited to get started on this cut project, thanks for the help!
I loved your blog, an article explained very well to decorate shirts, was looking for something for me decorate my daughter. Thanks for sharing
What an adorable idea. I think I’ll do this for two of my young granddaughters!
Thanks so much, Cheryl! I’m sure they’ll love their t-shirts! 🙂
great tips sometimes get lost half without knowing how to decorate the art of my shirts, and good semple learn new ideas, thank you!
Thanks so much, Ashley! 🙂
The shirt turned out so precious! I really like the idea of turning it into a night shirt so it can be worn more than just a few times. It looks so easy and fun to create. Thanks so much for sharing!
Very cute design. Cheers!
I also reminisce about puffy paint. Ha! Thank you for sharing this craft. The embroidery stitching is so cute!