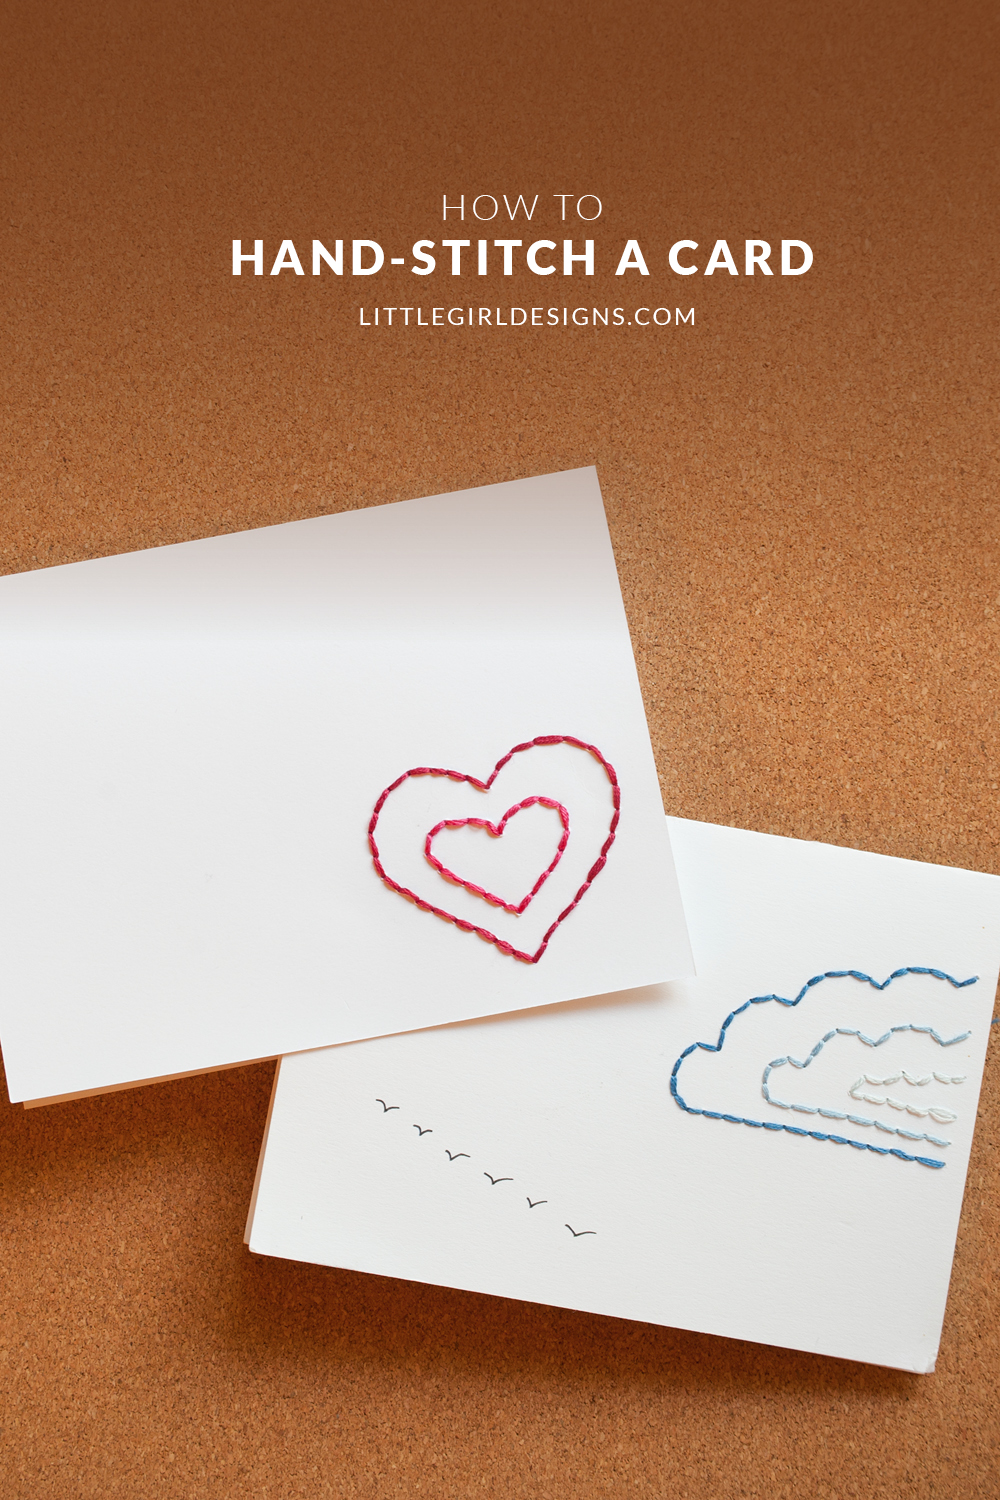
Want to learn how to hand-stitch a card? It’s a project that’s easy to make and so much cheaper than buying in a stationery store.
Years ago I saw a hand-stitched card in a stationary shop and fell in love. Well, maybe that is a little over the top but I really liked it. The only problem was the price was out of my card-buying price range. I went home and started playing around with the blank cards and embroidery floss I already had and soon had my own hand-stitched card.
This card is very simple to make and only requires a few supplies. You will need to know how to make a simple back stitch before starting this tutorial.
How to Hand-stitch a Card
You will need:
One blank card (Here are some inexpensive options.)
Pencil
Embroidery needle
Embroidery floss (I used a bright pink and a lighter pink for this heart)
First, draw your design onto the card. I drew dots around the perimeter of the hearts so I could space out the stitches but ended up making the holes a little closer together in the end. Use your embroidery needle to carefully punch holes through the card. I usually punch the holes from the front side (where the design is) and then turn the card over and punch through from the back so it is easier to stitch. Be careful because the paper will bend. Erase your pencil lines.
Now you can begin to back stitch. The nice part about this project is you just follow the lines. Below are a couple of pictures of me stitching this card—the second one shows how I tucked the thread under the first stitch so I didn’t have to make a knot.


Here I took a photo of me looping that last stitch in to make a knot. After knotting, cut the loose strands of embroidery floss.
Now that you know how to hand-stitch a card, you can make several and give them as gifts. You can also embellish them with your own drawings to add some more personality to each card.
If you like this tutorial, you’re going to LOVE my resource, The {10 Minute} Letter-writing Retreat Bundle. It’s packed with prompts, tutorials (like this one!), and printable stationery. Learn more here.
Have a lovely {and creative} day!


24 responses to “How to Hand-stitch a Card”
What a fun idea! I love handmade cards. I think they have so much more meaning! Thank you for sharing this fun craft. PINNED!
Thanks, Michelle! 🙂 🙂
Me encanta! I love it! Thanks for sharing…
🙂 🙂 And thank you for stopping by! Have a great day!
These are adorable!!
Thanks, Diana! 🙂
This is not something I’d ever considered doing but it’s such a unique way to add something different and personal to a card. Thank you so much for the idea and sharing the instructions. So glad I saw the link at the Weekend Wind Down.
You’re welcome! Thanks for stopping by! Have a great weekend! 🙂
These are really cute, and look like they are very easy to make! I like the idea of making cards, but I think of it too late. I’ll have to keep these in mind the next time someone has a birthday. Thanks for sharing, stopping by from the Pretty Pintastic Party.
Thanks for stopping by, Bev! I’ve made packs of these (4-6 cards) for gifts before and they always turn out so cute! Enjoy!
I am so in love with handmade cards and these are awesome! I would love to get one in the mail. So pretty and thoughtful!
Please visit our link up at http://theevolutionofmom.com/momma-told-me-link-party-5/
Jen
The Evolution of Mom
Thanks for stopping by, Jen! I visited your link party but the collection was closed. :/ But I’ll keep you in mind for the future! Have a great day!
These cards are just too cute!! They’d be perfect for so many occasions! I’m featuring them at today’s Creative Spark party. We hope you’ll link up with us again this week: http://twopurplecouches.com/2015/01/creative-spark-link-party-37/
Thanks so much, Emily! 🙂
Oh this is so lovely! I wanna try it 🙂 THANK YOU so much for the tutorial!
You’re welcome! Have fun! 🙂
Hi Jennie, your cards are absolutely adorable! Thanks for sharing tutorial. Pinned!
Have a great day!
Hugs and love from Portugal,
Ana Love Craft
http://www.lovecraft2012.blogspot.com
Thank you, Ana! I’m so very glad you stopped by! 🙂 Have a wonderful day!
I love these!!! Such a great idea!! Beautiful 🙂
Thank you, Lindi! 🙂
Jennie so beautiful!!! Found you on BonBon Break following you!
So nice to meet you! 🙂 Thanks for stopping by! 🙂
Beautiful! Nice tutorial 🙂 I have to get it together and start collaborating with some tutorials myself 🙂
Thanks so much–I’m glad you liked it! 🙂