Welcome to the first week of my Summer Crafting series. Every Friday for the next 10 weeks, I’ll be sharing easy crafts you can make over the weekend. Be sure to check back each week for new projects!
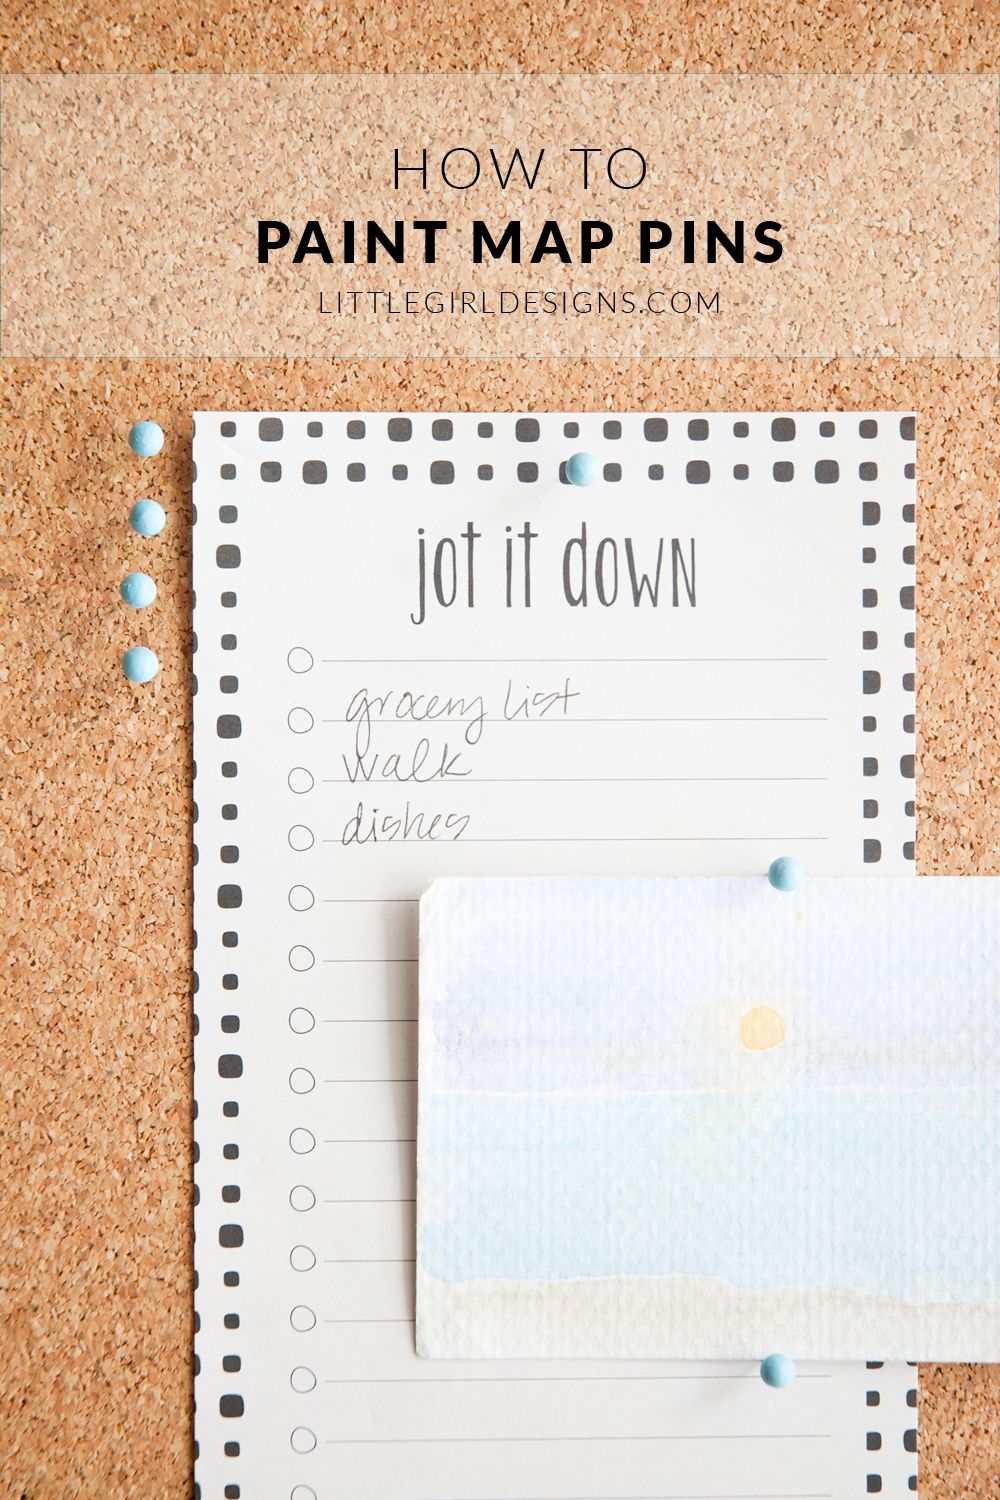
Do you have a package of plain map pins that need a little sprucing up? I know, usually I don’t think about something as small as a pin when it comes to home decor, but when you add pops of color throughout your home, you’ll see it begin to add up. This tutorial will show you how to paint map pins in fun colors that you love; who knows, you might start looking around at the rest of your office supplies with a new vision. What else could be painted? 🙂
But first, a quick story.
One of my projects for this summer is to organize, purge, and basically transform our office into a space that isn’t quite so cluttered. We live in a small apartment with little storage so unfortunately, the office has been the go-to place for the boxes of items that don’t have a home.
We have our “garage in a bag” (tools, car stuff, etc.), a random sleeping bag, a box of yearbooks that I can’t toss out, and many other things stacked in the closet. (re: the yearbooks—my excuse is my dad was a teacher and principal at our schools so it is also somewhat of a family photo album.) I actually started this project a couple of years ago when our daughter was teeny-tiny but the passage of time has allowed little things here and there to slip in and pile up, and well, it’s time to start over.
I started with the somewhat easy task of organizing my craft and office supply drawers and found so many fun supplies. Once again, I was inspired by my craft stash when I discovered a tiny plastic box of map pins. I use my cork board as an inspiration board and thought it would be fun to see if it was possible to paint them. Turns out, it is really easy to do. So if you have any old map pins hanging around the office supply drawers in your home, know that you can give them an update!

How to Paint Map Pins
You will need:
Plain black map pins
Acrylic paint
Small paint brush
Cork board or cardboard
Push the pins into cork board or cardboard so they won’t move. Paint with acrylics and let dry. Once dry, determine if you need another coat of paint and paint again. Let dry. That’s it!

Of course, you could leave the pins a plain black, but that little pop of color is just plain fun. I love how they stand out on the cork board and can imagine that a whole rainbow of colors would be wonderful.
Here’s a gift idea for a friend who loves all things organization:
Package your painted map pins with a small cork board and a stack of cute notes (grocery lists, to-do lists, etc.). You can find small squares of cork at craft stores or you could buy cork rounds at a hardware store. With the rounds, attach a picture hook on the back so she can hang it on the wall. Wouldn’t a mini gallery of cork rounds (and other round photos) be cute?
Well, that’s my simple craft for the day. Maybe I’ll count that one as my #2030make project. 🙂 (You can sign up here for our 30 day creative challenge called 2030make. It’s really FUN!)
I’ll be sharing more summer crafts in the coming weeks. But until then…
Have a wonderful {and creative} day!


