
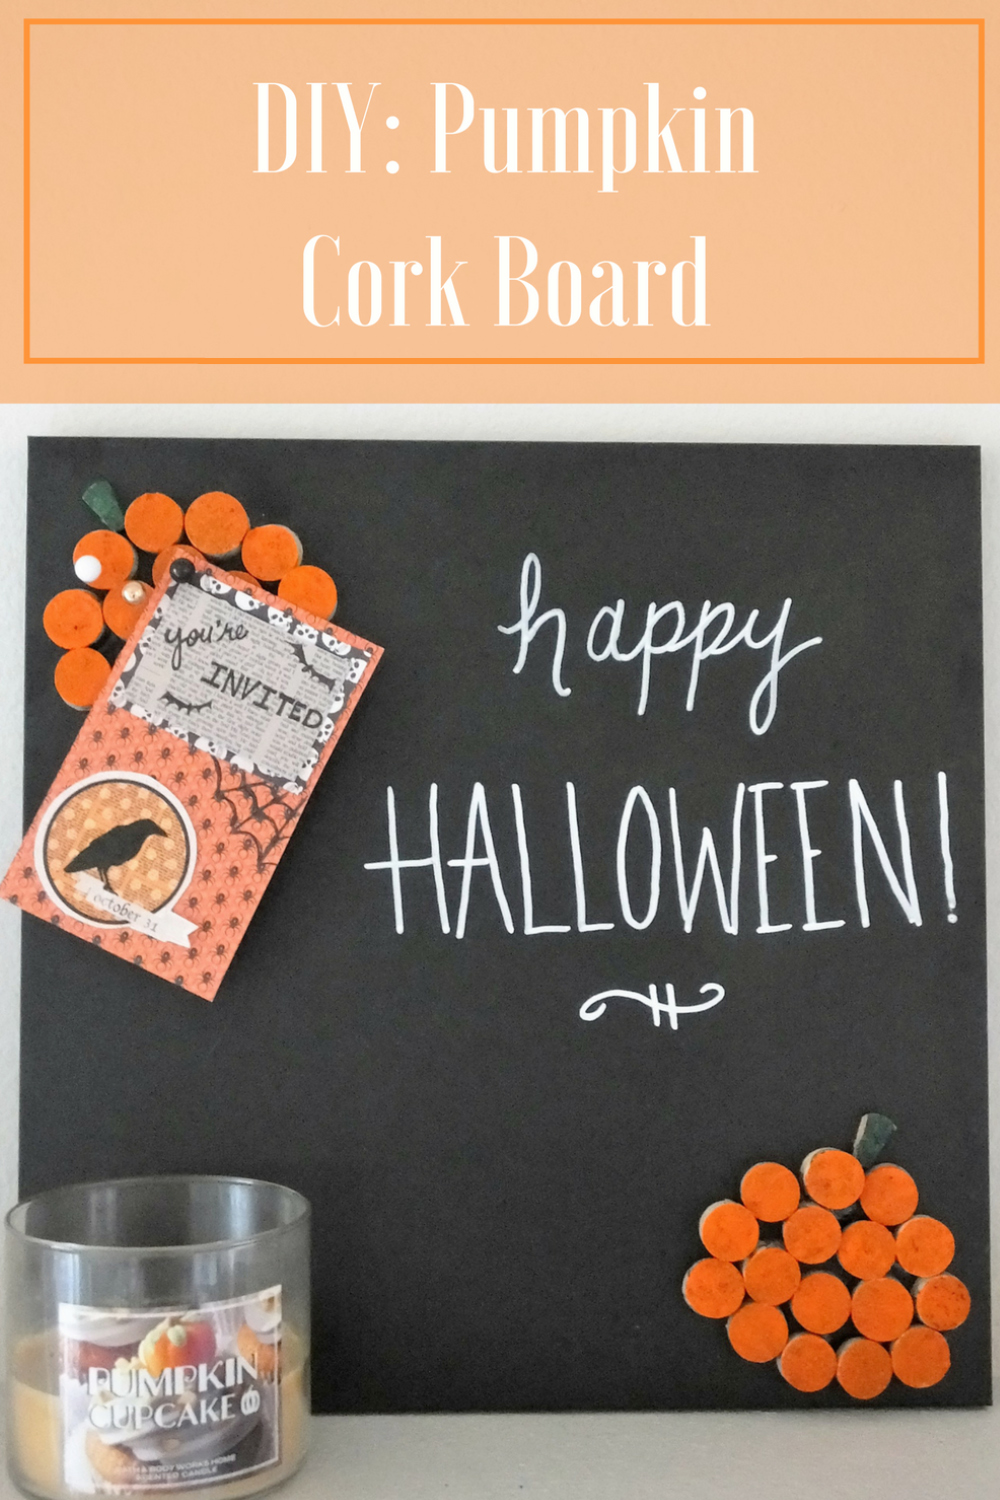
Today’s guest post is by Clarissa from The View from Here, and she is sharing a tutorial about how to make a pumpkin cork board. I love how you can make one of these now and have it around all through the fall. Read on so you can learn how to make your own!
Thanks for having me here on Little Girl Designs! Just one week into the season and my head is already overflowing with ideas for Halloween & fall DIYs—I’m excited to share this pumpkin cork board with you!
I’m sure you’ve seen countless projects on Pinterest using spare wine corks and if you’re like me, have had a box or drawer full of them at one point or another, just waiting for that perfect project to come along. Good news: your search is over!
This super easy project can be whipped up in an afternoon, adds some fall decor to your home, and is even functional—the trifecta, my friends.
You only need a handful of things, most of which you probably already have!
~ A chalkboard to use as your base (I picked up the one below at Target for $10, and it comes with one of those neat paint-chalk pens that restaurants use for their outdoor menus!)
~ A handful of wine corks (I used about 10)
~ A very sharp knife and cutting board
~ Orange and green paint (or whatever colors you’d like—this is your project and if you want purple pumpkins, you go right ahead!)
~ A sponge or paintbrush
~ E-6000 (the greatest super glue of all time if you ask me)

First, cut your wine corks into round slices. I made mine about ½ – ¾ inch thick. If this is going to be a functional cork board, you’ll want the slices to be thick enough for a push-pin or thumb tack to pierce into, without hitting the chalkboard behind it. If you’re looking more for just decoration, the thickness of the slices isn’t as important.

Don’t worry if the tops of your cork slices aren’t level or even with one another – it won’t matter – promise! As long as they’re generally all the same thickness, there’s no need to have them perfectly level.

Arrange your cork rounds into a general pumpkin shape, and take note of how it looks – it may be helpful to write down how many slices were in each row so you can easily re-create the pumpkin shape later.
My pumpkin ended up having 2 rounds on top, 4 rounds after that, 5 rounds after that, and another 5 rounds at the bottom, with all rows curving upwards at the edges to give it a rounded, pumpkin, shape. Since I decided to make two small pumpkins for my chalkboard, I ended up needing a total of 32 wine cork rounds (16 round slices per pumpkin).

Then, paint your cork rounds! I used a sponge brush so I could push the paint into the cork for full coverage, but I think a paintbrush would’ve worked just fine.

Once all of your cork rounds are painted, let them sit for a few hours, or until dry to the touch.

While waiting, cut out little stem shapes from extra wine cork, and paint them as well.

Once everything is dry, it’s time to add your rounds to your chalkboard! Using E-6000, dab a pea-sized amount of glue to the back of your wine cork rounds.

One at a time, add your cork rounds to your chalkboard, reassembling the pumpkin shape you created earlier.

Once all cork rounds are attached, press down to squish the glue underneath, ensuring that everything will stay in place.

Add your stems with your glue, and then wipe away any excess glue on the chalkboard with a damp paper towel.

And that’s it! Enjoy your new pumpkin cork board message center and relish in the fact that you’ve finally used up some of those old wine corks!

Thanks again for having me here on Little Girl Designs – I hope you’ll stop by The View From Here to check out more amazing fall DIYs this season!
Clarissa is the blogger (read: creative mastermind) behind theviewfromhere.is—a DIY-focused creative space where she also dabbles in recipes, travel adventures, and her life in Boulder, CO with her boyfriend and their three incredibly spoiled fur babies. Check out more of her projects on her blog, and be sure to follow her on Instagram, Pinterest, and Facebook.


17 responses to “DIY: Pumpkin Cork Board”
Great idea for Halloween! I love it. Thanks for sharing!
This is too cute with the corks!! Such a great idea!
Jenna from http://www.visionsofvogue.com
Aww thats so cute! As soon as autumn hits I’m looking aor any way to deck my place out in pumpkins! :p
What a cute diy idea! I have never seen this before. I love crafts like these that are easy enough to do with my children, but also useful so they don’t just take up space and time. Thanks for sharing!
Love it! Perfect for a Halloween, thank you!
Thanks so much, Kirsty! 🙂 I love what Clarissa made. 🙂
Hi Clarissa!
Great DIY project! It’s so cute and perfect for the season. I am pretty much in love with anything pumpkin related this time of year. This board would be perfect for a Halloween party or great office decor ?.
xo Gennifer
http://www.GenniferRose.com
Thanks Gennifer! <3
What a great idea, my girls will love this project!
Thanks so much! And p.s. your recipe for pineapple chicken fried rice sounds amazing!
I love this idea not only for my home, but for my classroom! It’s so cute, but also really functional looking. I am going to have to try this out.
What a great idea to make one for your classroom. Love it! 🙂
We love this idea, it looks like perfect for our home! We love your way to think, you have cool ideas, great 🙂
Such a great use of wine corks. You have inspired me to find out all the different crafting I could do with them (not that I’m a huge wine-drinker, but I could be… haha) Great post! Pinning 🙂
This is so cute and would be super easy and cheap to make! I absolutely love it!!!
So very cute!
Great idea…. Something diferent….