Welcome to the fifth week of my Summer Crafting series. Every Friday for the next 5 weeks, I’ll be sharing easy crafts you can make over the weekend. Be sure to check back each week for new projects!
This is a project I’ve been wanting to make for a looooong time. I first came across something like it on The Pink Samurai and then on The Crafty Swedes but for whatever reason, I never made the trip to the craft store to actually buy wooden beads to make it. I would like to say this is because the craft store is very far away but the reality is, my daughter and I walk past it several times a week on our way to the park. So, well . . . I guess it was just a case of creative procrastination at work again. Such is life.
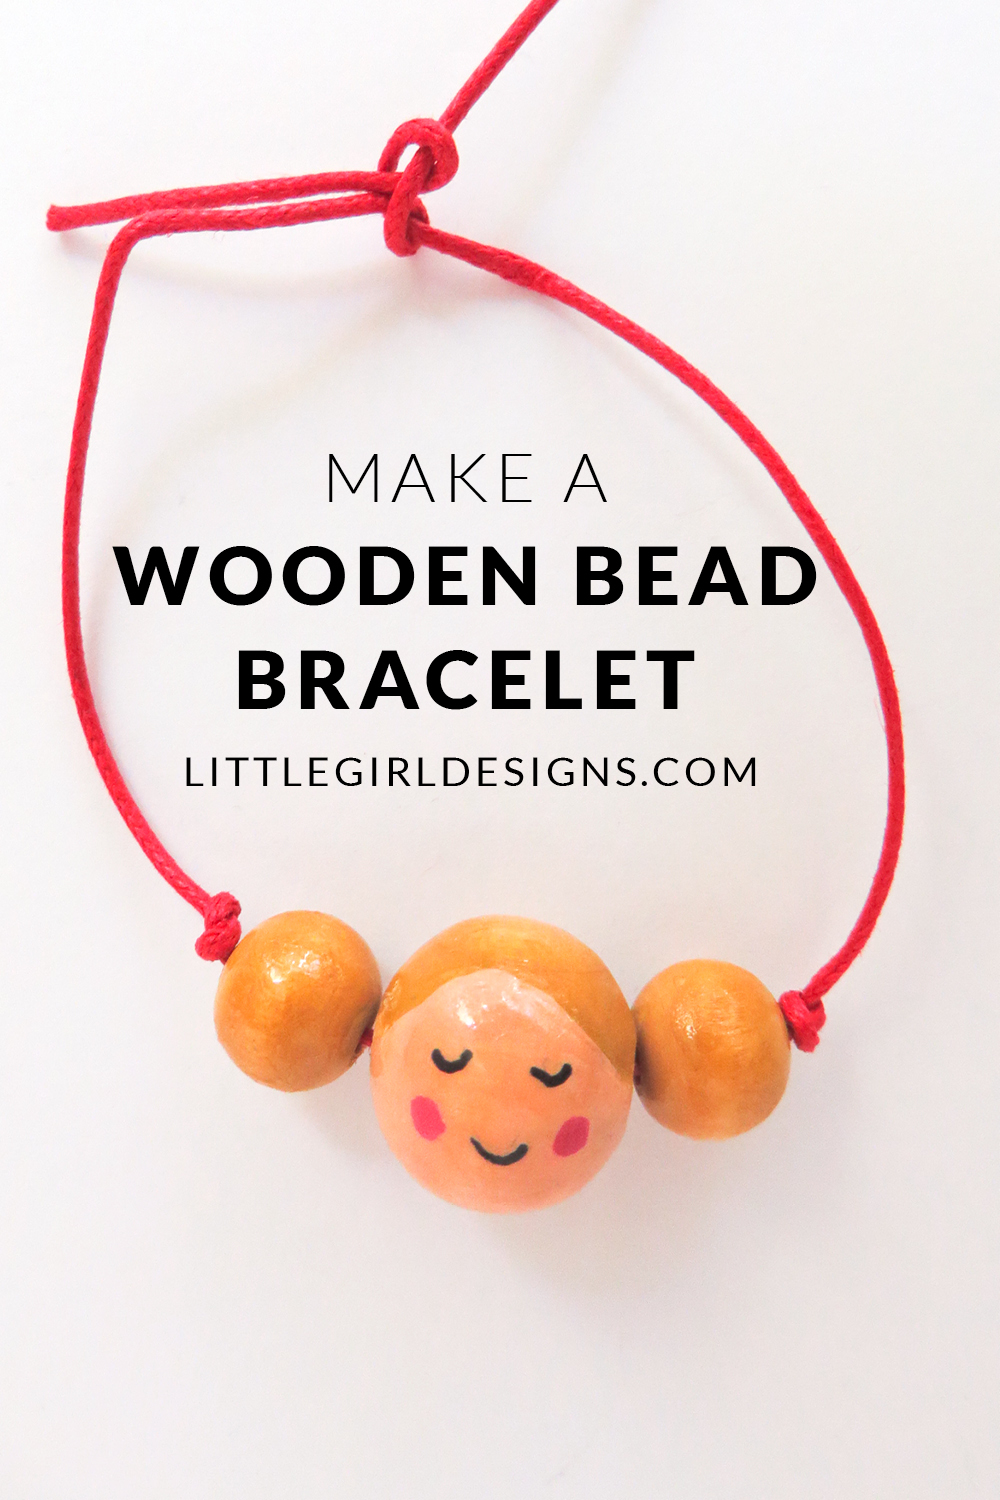
Anyway, I finally got around to buying the beads and whipped up this bracelet one afternoon. Too fun. I love that you can customize the color of the hair and skin to make this little girl your own. Before we get started, I have to share a couple tips I learned along the way in making this bracelet. In other words, here are the mistakes I made so you don’t have to make them. 😉
- Use acrylic paint. I used gouache and completely forgot that gouache has the sweet way of coming back to life when you add water (or any moisture) to it. This is wonderful when you’re painting and want to fix a mistake. Not so great when you’re trying to seal a wooden bead bracelet and the paint starts smearing. Eek!
- The small beads in this project are supposed to be the little girl’s pony tails so remember that when you’re sketching the face onto the medium bead. The holes of the “face” bead should be on the left and right, not the top and bottom. If they’re on the top and bottom, you’ll make a project that is similar to the Pink Samurai project where the beads stack on top of each other. Totally fine, but not what we’re making here.
- Make sure you use a waterproof pen for the eyes and smile. Otherwise, like the gouache, it will smear when you seal it, and that will be very sad.
How to Make a Wooden Bead Bracelet
You will need:
One medium wooden bead
Two small wooden beads
Cotton cord or embroidery floss
Paint brush
Acrylics
Waterproof black pen
Clear nail polish, white glue, or Mod Podge
Wooden skewers + play dough (Keep the play dough in the container.)
First, place two wooden skewers in the play dough, and string one small bead on each one. I found the small beads did not slide all the way to the bottom when I did this; if they do, you can make a barrier of play dough on the skewer that keeps the bead from sliding down. (You can also use the Pink Samurai/The Crafted Life tip of using masking tape to keep the bead from sliding.)
Using your paint and brush, apply one coat of paint to the bead. I used a yellow tone because my daughter’s hair is blonde. You can use whatever color you want. Paint the second bead, and set aside to dry.
Take a pencil and lightly outline the girl’s face and hair onto the larger bead. Be sure to line the larger bead up with the smaller ones so you draw the face in the correct place.

Paint a light wash of skin-colored paint for her face. Let dry. Then paint in her hair. I did not use a skewer to paint her head because I was able to twist the bead around without touching the paint. You do what works best for you. After the paint is dry, draw her eyes and mouth with the waterproof pen.
Once the paint is completely dry, apply a coat of Mod Podge, watered down glue, or even clear nail polish to seal the beads. While they dry, measure the cord or embroidery floss around your wrist and cut to size. When the beads are finished drying, string them on the bracelet and tie knots on either side of the small beads to keep them in place. You could also cut a longer length of cord or floss to create a necklace.

Making this project was as much fun as I thought it would be—fast, simple, and super cute.
Have a lovely {and creative} day!


2 responses to “Make a Wooden Bead Bracelet”
It’s been awhile since I checked out your craft. I’ve been wanting to see what you’re doing but life has been hectic since the school holiday. Thank goodness routine has started to flow normally again. This is so cute! I would love to wear this myself! I love anything with a cute face on it. I’m going to pin this, and if I’m lucky, I will find the time to do this one (for myself! :P) Also, congratulations on publishing your Creative Retreat E-Book. Good luck on release day! Not long now…
Thanks so much, Veronika! I have to admit I made this bracelet for me because I love little smiley faces too. 🙂 My daughter loves it when I wear it…I think it would be fun to make a “family” bracelet with each of us represented. Thanks so much for your kindness about the creative retreat release. Can’t believe it’s This Week! 🙂 Yay! Have a great week, Veronika!