Welcome to the eighth week of my Summer Crafting series. Every Friday for the next 2 weeks, I’ll be sharing easy crafts you can make over the weekend. Be sure to check back each week for new projects!
This week is also week three in my How to Make an Art Journal series. Click here for week one where I shared how to make leaves out of old book pages and here for week two where I made the front cover.
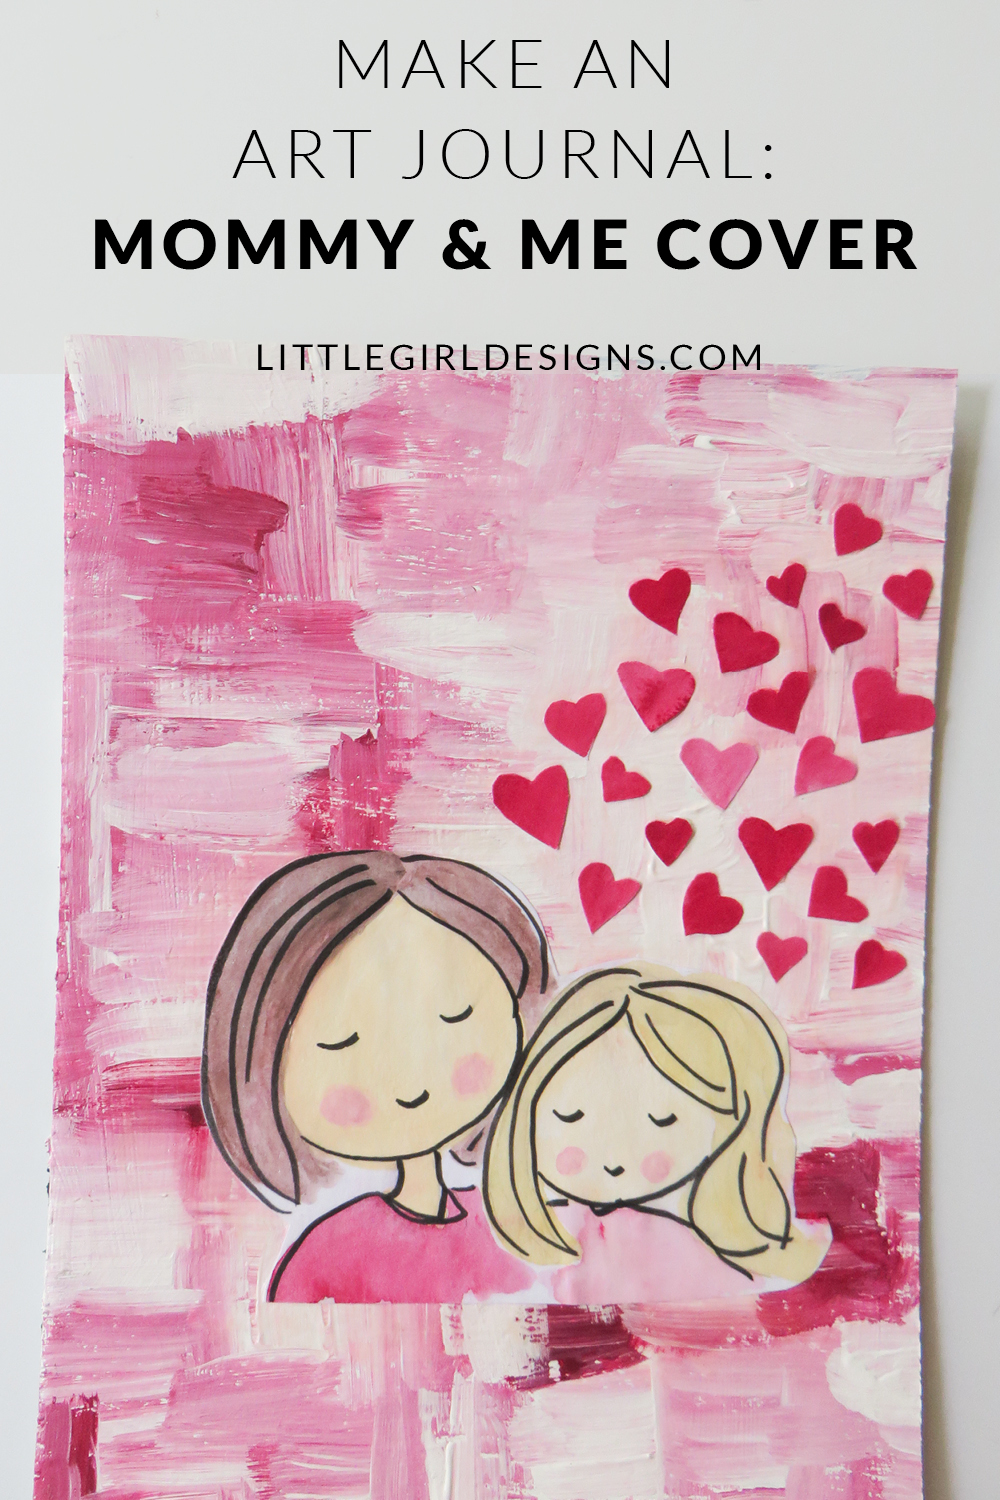
At the beginning of the summer, I shared how I was taking a couple of Creativebug classes to learn new techniques. One of those classes was Drawing and Illustration Basics by Heather Ross. My favorite thing about her class was learning how to make whimsical drawings of a child with their favorite stuffed animal. She shared that by changing hair color and the toy, you can easily create a customized piece of art even if the painting is fairly simple. I decided to use that bit of wisdom for a painting I made for my husband for Father’s Day and again for the back cover I made for my new art journal.
As I mentioned last week, I have been making journals for a while, but this was my first foray into the world of binding my own with o-wire. I chose to make my covers out of chip board so they would be more sturdy and hopefully stand the wear and tear I give my journals during the course of a year. 🙂 This technique can also be used for making a stand-alone art piece for your home or as a gift.
How to Make a Mommy and Me Art Journal Cover
You will need:
Chip board (either pre-cut or use the back of a pad of art paper like I did)
Acrylics (I used red and white)
Paintbrush (medium to large)
White drawing paper (needs to be heavy enough to handle watercolor/paint)
Gouache paint
Pencil
Black brush pen (with permanent ink)
Scissors
White glue
First, I made the cover. I squeezed red and white acrylic paint onto my palette, dipped the brush into the red and then dipped it just slightly into the white paint. I used broad strokes as you can see below and really laid the paint on thick (see the second close-up photo.) Do not use gouache for this part of the project. It will smear like crazy when you seal it at the end.

I wanted my journal to have personality and texture. I also didn’t want to make this process too precious, in terms of carefully painting and hoping I wouldn’t make any mistakes. The honest truth? I painted this quickly one evening at the dining room table when my parents were visiting. I think we were waiting for dinner to finish and I just sat down, whipped out the paints, and painted my cover. On a side note, I think it’d be fun to make something like this on a larger scale for a big piece of art work. 🙂

The cover will have to dry so set it aside and get to work on the mommy and me portrait. Now, this really could be a portrait of anything but I chose to sketch a little drawing of my daughter and me.
I started off by using a pencil to sketch a quick picture. By using pencil, I could erase and adjust as needed before I was satisfied with my drawing. When I took Heather’s class, she suggested using kneaded erasers so you don’t have to constantly brush the eraser bits off your drawing and that has been a revelation for me. I mentioned this to my husband, and he was very kind to not act too surprised that I had never used one before. I just thought they were weird looking.
Anyway, I digress. Heather’s class shows her sketching three illustrations of children and you get to see the loose strokes she used in the video. You really want to be careful to not get into too much detail here since this isn’t meant to be a masterpiece of a portrait. Also make sure to use a light hand with your pencil. You can erase some of the strokes later, but many of them will be set in stone once you paint over them.

You’ll notice on my sketch photo that there is a blop of color on it. I made the mistake of not testing my paint colors off to the side on the paper before I jumped right into painting and wow, that was not the color I was going for. Since you’re going to cut out the picture anyway, you can use the rest of the paper to test small swatches of color.
Mix your paint to the desired color and add water to make it more translucent before painting. Paint one color at a time, allowing each color to dry. Gouache is wonderful because you can add a little water or paint to your brush and layer colors onto the paper. The only bad part is because it is affected by water, when you go to seal the paint later, you’re going to have to be very careful. If you’re never tried working with gouache, you could skip it altogether and just use acrylics for your first time around. That way you won’t have to worry about smearing later on.

At this point, I also painted several hearts onto the paper. I initially drew them with pencil but liked how they looked when I painted them freehand better. Let the paint dry and then erase any stray pencil marks. Using quick strokes, use a brush pen to outline each element. If you’re never used a brush pen, practice on a separate sheet of paper to get an idea of how they work. (I love them!) Cut the portrait and the hearts out.

When the cover is dry, arrange the portrait and heart elements, keeping in mind where you will be binding the journal. You can place a sticky note on the edge you’re binding if you’re working on this project during different times. I wish I had done this because I ended up binding the wrong edge, but it turned out fine in the end. 🙂

Anyway, once you’re figured out the arrangement of shapes, use white glue to put them in place. I either use my fingers or a paint brush for this part because I want to make sure the pieces lie perfectly flat. Note: this is where you need to be super careful if you used gouache. Now, carefully paint the glue over each piece. Check your brush to make sure you’re not picking up paint and rinse it if needed. You can also water the glue down a little bit if you prefer the glue to be thinner. I just use it as is.

So, that’s part three in how to make your own art journal. I can’t wait to show you the final project for next week’s tutorial.
Have a lovely {and creative} day!


2 responses to “Make an Art Journal: Mommy and Me Cover”
Going to get working on this next!
Your art journal creation would be sooo amazing! I want to see pictures. 🙂